Tuesday, April 27, 2021

"Dragonflies in My Garden" is Finished

 I finally finished this wall hanging.  Since I have a granddaughter that also loves dragonflies, I will make it a gift for her.

Dragonflies in My Garden finishes at 17 by 21 inches.  I think she will like it.

I am thinking of making another one for me, but only the one dragonfly, the beauty that I saw in my garden years ago about 5 or 6 inches long and a stunning electric blue.  I have some large flower fabric that I can use as a background.

But for now I must finish a couple of other projects I have let slide.  One is a stained-glass project with golden roses.
This is how I left it.  Lots of satin-stitching needed before it looks decent.

Another is a panel that I just fell in love with when I saw it.....
I have been a horse lover since I first saw Trigger, Roy Roger's horse, and his golden coat and silver mane and tail.  That was a lot of years ago.  So this panel called to me.  The horse is not a palomino, but he's beautiful.  I added a brick barn floor and you see him thru the barn doorway.  The wooden sides fabric I added are the barn door edges.  I also added a cute little black pup since this photo was taken.  I really need to finish this and hang it on my wall.  It will be a restful and beautiful scene to wake up to in the morning or as you enter my apartment.  

In the housecleaning realm, I was posed a problem.  I have trouble these days bending down and I cannot possibly get down on my knees or I would never be able to get back up again.  What to do with the corners that need a scrub and are too small for the mop.  Well, years ago my Mother (I still miss her) was posed that problem and I remember how she solved her dilemma.  She took a yardstick and wrapped a cleaning rag on the end of it that was held on with a rubber band.  It worked for her.
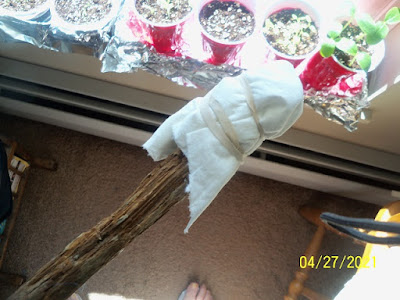
My version was a trial run today so I just wrapped a couple of layers of paper towel on the end of an old broom handle I kept (I had used it while walking the dogs sort of as a trekking aid), and lucky me, it works.  I will just place a wet rag on the end when I need to scrub an area.


Here is a look at this contraption.  The old broom handle is sturdier than a yardstick and I can give a good scrub in those small corners and edges.  I now have clean corners.

In the garden area my seedlings are doing pretty well.
Here we have left to right Tom Thumb lettuce, Mini-Green peppers which on this date only has one bit of shoulder pushing thru, another cup of Tom Thumb lettuce and on the right are my Bush Pickle cucumbers.
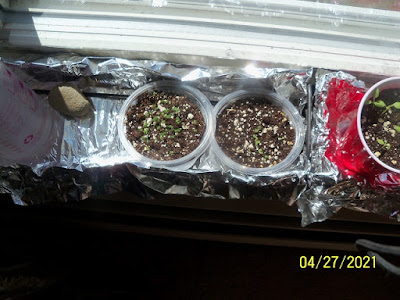
These short cups hold Summer Thyme on the left and Stevia on the right.  All are looking healthy so far.  I keep hoping that our raised garden beds are made soon.  Its too early to transplant these anyway, but soon they will need thinning out and more room per plant.  I do not have the space nor facilities to stretch my indoor garden very much more than this.  Crossing my fingers that our garden gets built in a hurry.
That's it for now my friends.  I hope you are all doing well.  Stay safe. 

Wednesday, April 21, 2021

I Am Sowing Seeds Indoors Today

 My 20-qt bag of Potting Soil was delivered yesterday.  I just love home delivery.  With that here I needed to get some seeds sown indoors.  These are ones that need starting before last frost so that they can grow inside and then when big enough, get transplanted outdoors.

Armed with a few essentials, I went to work.  I had Latex gloves on hand for working with the soil.  I had clippers to notch the bottoms off soil cups.  I had a spritzer bottle for wetting the tops.  Along with some Solo drink cups and a couple of leftover plastic short cups from KFC deliveries (by my son) I was ready.

I chose to buy my potting mix from Gardeners Supply online.  I have had good dealings with them in the past and they are prompt with deliveries.  I did not need very much.  Any leftover this year I can add to my raised garden bed later.
 I usually start my seeds with sterile planting mix but space is limited in my tiny apartment so I went to step 2 with Potting Soil Mix.  I have to transplant into larger pots when the new seedlings are still small which would go into potting mix at that time, but no room to stretch around here.  So into Potting Mix they went.

I had two of these trays on my windowsills for decorations and statuary so brought them into use for my seed starting.

I lined them with aluminum foil to keep them in good shape and also to make a shallow space under my pots for escaping moisture and excess watering.

Whatever you use for your seeds, be sure to cut holes in the bottoms around the base so the water can escape.  You do not want to drown your seedlings by allowing water to accumulate in the soil.

I also had a spritzer bottle on hand so that will work fine for watering my new seedlings gently.

With newspaper layered on my dining table, I went to work.
First I filled my cup near to the top with potting mix and wet it down.  The soil will drop down with the wetting so you just add a little more on the top and wet it again.  Seeds need the moisture so this first wetting is important.  I sowed a few seeds across the tops and sprinkled a bit more soil on top of them and spritzed the soil.  The soil needs to adhere to the seeds to get them to germinate.

The taller Solo cups have Bush Pickle Cucumber seeds, Mini Red Bell Peppers, and then 2 cups with Tom Thumb Lettuce seeds.  The short cole slaw containers from KFC have Stevia seed in one and Summer Thyme in the other.  I placed them on the trays in the window where they will get the warmth of the Southeastern sun all morning and most of the afternoon.  

When the sun disappears or it gets cooler on the windowsill, I can transfer the containers to my table set-up.  Also if its a cloudy or rainy day, they need the light so the tabletop will suffice.
I have two table lamps with which I can direct the lighting to help grow the seedlings which I will place in a plastic container that I had spare.  As usual my plant starts will get 12 hours of light and 12 hours of darkness in the evenings.  If I think they need more light, I will just keep them under lights longer.

I hope they will thrive with this plan.  I cannot be sure since I have never started mine with potting mix nor have I put them on windowsills.  I had track lighting in the basement of my home.  I will hope for the best.  Maybe, if I am lucky, I will have some transplants for my raised garden bed when its ready and its past our last frost date.  That for us is usually around Memorial Day and sometimes not until June 10th.  I have my fingers crossed.

Enjoy your day.

Monday, April 19, 2021

Our Gardens are Starting to Bloom

 Its April 19th and its sunny and mild today here in southwestern Maine.  Tempts near 60F but with a very strong breeze that whips you like a cold wet towel.  Still, I will enjoy it.  Its spring.

Here are some photos I took of our back garden today......

Our birches are lovely with the peeling bark.  We have a couple of triple stands in our garden.

Here are some of our lovely daffodils in white and yellow.

Here's one of our garden plots with white, blue and yellow showing this spring.

I have no idea what these small blue flowers are named, but they are adorable. They may be Muscari which is the Grape Hyacinth.  These are very small.

We have three main garden areas off our back patio.  This is the first one.

The second plot is on the right in this photo and closest to the lawn in the back yard.  You can also see the container garden area on the left.

This is the 3rd area which also has a cluster of white birches among its garden features.   So far its just daffodils and jonquils.  There are many leaves for the tulips but no blossoms showing yet.  And the Hyacinths are still not up.  

I am enjoying our spring.  I will enjoy it more when they put in  the raised beds for the tenants.  I am on the list to get one.  I have already ordered some potting soil online so I can sow some seeds in Solo drink cups so they are ready for my plot at proper transplanting time.  The four mini tomato plants I ordered from TerritorialSeed.com are scheduled for delivery the end of May.  Our last frost hits around Memorial Day so I did not want them here too soon.  My fingers are itching to get in the soil.  

I hope everyone is enjoying their spring and getting out in the fresh air when they can.  Be safe.

Thursday, April 8, 2021

I Managed to Get the Satin-Stitching FInished.

 My satin-stitching is done around my Dragonflies.

It was an effort, but one that needed doing.  I will do more this week.  For now I am content that the satin-stitching is behind me.  It makes the dragonflies show up so much better than without.

Have a good day. 


Tuesday, April 6, 2021

Easy Macaroni and Cheese from an Indiana Mom

This recipe is tried and true.  I wanted an easy recipe because I do not like complicated ones.  A quilter buddy sent this to me from her Mom's recipe file.  I tried it.  I liked it.

Ingredients:

4 Cups (1 lb.) Cooked Elbow Macaroni

15 American Cheese Slices

8 oz. Shredded Sharp Cheddar Cheese, or just use your favorite cheese.  Its to your taste.

3/4 Stick Butter, cut into pats.

3 Slices Torn White Bread, Crumbled into Crumbs

1 Egg, beaten into

1 1/4 Cup Milk.

In a greased 9 x 13 casserole dish or baking pan, layer cooked macaroni, sliced cheese, shredded cheese and butter pats in that order.

Cover with the Bread Crumbs 

In a 2-cup measuring cup or bowl, Combine the egg and 1 1/4 Cups of milk  and beat with a fork.

Pour the milk and egg mixture over the cheese dish.

Bake at 350* about 30 Minutes.

I used Land O'Lakes American Cheese slices.

Grated 8 Oz. Cabot Sharp Cheddar Cheese.  You can use yellow cheese if you prefer but I did not have any on hand.  Its best to use your favorite cheese since its made for your palate.

This is 3 slices American White Bread made into bread crumbs.  I will post pix on my method to make them into crumbs at the end of this post.

Cut 3/4 of a stick of butter into pats. 

Butter or spray with Pam a large 9 by 13" casserole dish or baking pan.

After draining, but Do NOT rinse,  the cooked macaroni (cook it sort of just before softer stage.  Closer to the shorter number on the box's cooking directions.  The macaroni will cook a bit more while its baking in the oven).
Pour the macaroni into the casserole dish and spread out evenly.

Layer the American cheese slices on top of the macaroni.

Spread your favorite shredded cheddar cheese or other favorite cheese over that. I grated mine on my box grater.

Distribute your pats of butter over the shredded cheese evenly across the top.


Spread the Bread Crumbs evenly across the top of the casserole dish.

Pour the beaten egg and milk mixture over the breadcrumbs distributing it evenly around the top.

Bake in 350* oven for about 30 minutes until there's some browning on the top of the breadcrumbs.
Your dish will look like this when its done.  A bit of brown on the crumbs. 

Spoon mac and cheese into serving dishes.

Thank you dear Indiana Mom for this Easy Macaroni and Cheese dish.  It was easy and very tasty.  
You can save the leftovers in the fridge in a covered container.

Now here is how I make my homemade Bread Crumbs.  I use these for any that require them, like meatloaf, meatballs, Lithuanian Bundies.

I use FRESH  American Bread slices like this above.

Tear them up into a few parts and then start crumbling them between your hands.

I rub them and rub them between both palms and let the small bits fall into a bowl.  The larger bits I keep working on, rubbing and re-rubbing together.

When the Bread Crumbs are the size you want them, you are done.  Place in a covered container until you need them. 
Personal note:  I like them made from Fresh bread, not stale.  They crumble just fine.

I found this Mac and Cheese dish very tasty and much nicer than any frozen brands I've tried over the years.  The best part is that it wasn't difficult and there were not that many ingredients to make it tough to make.

Enjoy my friends.

Next day's leftovers Report.....
Mac and Cheese can be dry when you reheat it for a later meal.  I tried adding a spoonful of milk to the leftovers and mixing it around a bit before placing in the microwave.  It sure made a good difference from the drier leftovers I ate the night before.  It adds that needed moisture element.  Very good.  Take my advice and add a bit of milk to your side dish before heating it.
Two Thumbs Up.

How To Make Farmer's Cheese

I found this video on youtube from a homestead family I watch all the time.  They give excellent advice about homesteading and cooking and prepping foods.  This is how they make a fun snack food, but I saved the video because I love Farmer's Cheese and this shows how to make it from beginning to end.

I am going to try making this cheese for myself.  Right now I order it from an out-of-state site and its costly especially to ship.  It would be nice to be able to make my own.
Thank you Living Traditions for this video. 

Sunday, April 4, 2021

'Dragonflies' is Just Beginning

 Its a lovely day here in southwestern Maine today.  Sunshine and temps are rising. Its quite springlike today.

I made a start on my next quilting project.  Its titled "Dragonflies" and will feature 3 Dragonflies flittering above a flower patch.  When I found this flower fabric, I could not resist it.  Its a perfect background for this project. 

I made the 'flies'  in 3 different colors.  This was inspired by a gorgeous dragonfly I once met in my flower garden.  It was so large compared to so many I'd seen before and his color was a fabulous blue.  I swear to you he had to be at least 5 inches long.  Simply wonderful.

I am petered out of energy right now so I will try to continue this project tomorrow.
Have a good day my friends.  S 


Thursday, April 1, 2021

The 'Mermaid' Door Hanging is Finished.

 I took the time this morning to finish my' Mermaid' door hanging.

It measures 13.5 by 18 inches and fits well on my front door.  She will adorn it sometime after the Easter season.  

I have other chores to do today so I will not begin on the Dragonfly door hanging today.

Have a good day.